在 Kubeflow 的 Notebooks 中记录元数据
谱系追踪工作原理演示


!pip install kubeflow-metadata --user
# Install other packages:
!pip install pandas --user
# Then restart the Notebook kernel.
import pandas
from kubeflow.metadata import metadata
from datetime import datetime
from uuid import uuid4
METADATA_STORE_HOST = "metadata-grpc-service.kubeflow" # default DNS of Kubeflow Metadata gRPC serivce.
METADATA_STORE_PORT = 8080
ws1 = metadata.Workspace(
    # Connect to metadata service in namespace kubeflow in k8s cluster.
    store=metadata.Store(grpc_host=METADATA_STORE_HOST, grpc_port=METADATA_STORE_PORT),
    name="xgboost-synthetic",
    description="workspace for xgboost-synthetic artifacts and executions",
    labels={"n1": "v1"})
r = metadata.Run(
    workspace=ws1,
    name="xgboost-synthetic-faring-run" + datetime.utcnow().isoformat("T") ,
    description="a notebook run",
)
在运行中创建执行
- Execution 是运行的特定实例,您可以将特定的输入/输出工件绑定到此实例。执行(Execution)也用作将其工件记录为输入或输出的对象
exec = metadata.Execution(
    name = "execution" + datetime.utcnow().isoformat("T") ,
    workspace=ws1,
    run=r,
    description="execution for training xgboost-synthetic",
)
print("An execution was created with id %s" % exec.id)
date_set_version = "data_set_version_" + str(uuid4())
data_set = exec.log_input(
        metadata.DataSet(
            description="xgboost synthetic data",
            name="synthetic-data",
            owner="someone@kubeflow.org",
            uri="file://path/to/dataset",
            version="v1.0.0",
            query="SELECT * FROM mytable"))
print("Data set id is {0.id} with version '{0.version}'".format(data_set))
- Log_output 将工件记录为此执行的输出。此处 exec.log_output 接受工件类作为参数,而 Model 是一个工件。每个工件都有不同的参数,如 name、uri、超参数(hyperparameters)。创建 Model 工件的方式是调用现成的 API metadata.Model 并提供参数
model_version = "model_version_" + str(uuid4())
model = exec.log_output(
    metadata.Model(
            name="MNIST",
            description="model to recognize handwritten digits",
            owner="someone@kubeflow.org",
            uri="gcs://my-bucket/mnist",
            model_type="neural network",
            training_framework={
                "name": "tensorflow",
                "version": "v1.0"
            },
            hyperparameters={
                "learning_rate": 0.5,
                "layers": [10, 3, 1],
                "early_stop": True
            },
            version=model_version,
            labels={"mylabel": "l1"}))
print(model)
print("\nModel id is {0.id} and version is {0.version}".format(model))
记录模型评估结果
- Metrics 捕获模型在数据集上的评估指标
metrics = exec.log_output(
    metadata.Metrics(
            name="MNIST-evaluation",
            description="validating the MNIST model to recognize handwritten digits",
            owner="someone@kubeflow.org",
            uri="gcs://my-bucket/mnist-eval.csv",
            data_set_id=str(data_set.id),
            model_id=str(model.id),
            metrics_type=metadata.Metrics.VALIDATION,
            values={"accuracy": 0.95},
            labels={"mylabel": "l1"}))
print("Metrics id is %s" % metrics.id)
serving_application = metadata.Execution(
    name="serving model",
    workspace=ws1,
    description="an execution to represent model serving component",
)
# Noticed we use model name, version, uri to uniquely identify existing model.
served_model = metadata.Model(
    name="MNIST",
    uri="gcs://my-bucket/mnist",
    version=model.version,
)
m=serving_application.log_input(served_model)
print("Found the mode with id {0.id} and version '{0.version}'.".format(m))
绘制谱系图
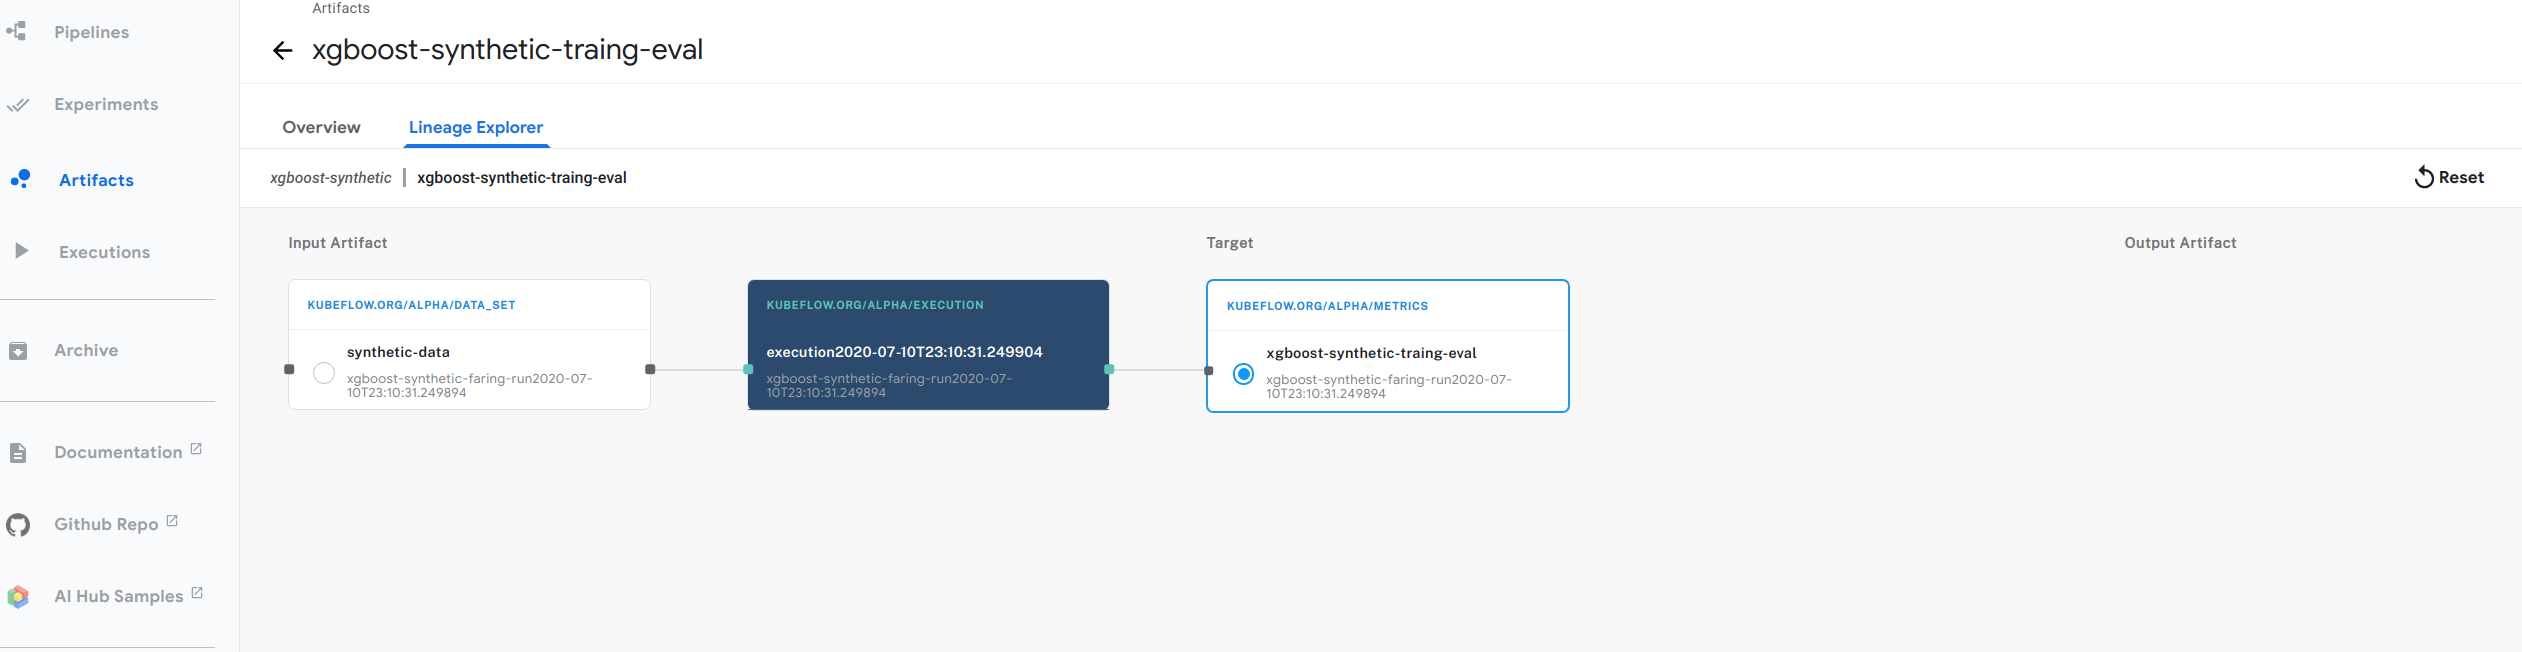
- 上图显示了我们 xgboost 示例的谱系图示例。按照以下步骤进行尝试
- 按照指南在 Kubeflow 中设置您的 Jupyter Notebooks
- 回到 Kubeflow UI 中的 Jupyter Notebook 服务器。(如果您已从 Kubeflow 中的 Notebooks 部分离开,请单击左侧导航面板中的 Notebook Servers 以返回。)
- 在 Jupyter Notebook UI 中,单击 Upload 并按照提示上传 xgboost 示例 Notebook。
- 单击 Notebook 名称 (build-train-deploy.ipynb.ipynb) 以在您的 Kubeflow 集群中打开 Notebook。
- 运行 Notebook 中的步骤以安装和使用 Metadata SDK。
- 单击 Kubeflow UI 左侧导航面板中的 Artifact Store。
- 选择 Pipelines -> Artifacts
- 导航到 xgboost-synthetic-traing-eval
- 点击 Lineage explorer